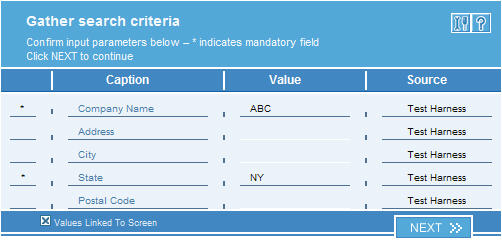
Purpose of this plug-in is to purchase Experian credit reports and integrate its wealth of business information directly into your favorite application screen. The plug-in consists of several pages. All of them will the shown below: Gather search criteria : In this page the plug-in gathers information from the application. To get credit reports for a different company other than the company in the linked screen, uncheck the “Values Linked to Screen” checkbox and enter the data manually. Recheck the checkbox to return to read-only mode and refresh data from the application's screen.
To search for companies that meet the criteria the Next button needs to be clicked. After this the Select a company page will show up. If you get the Error, parsing data returned from the web service message you will need to increase the timeout in the configure tab (more details about how to do that on the end of this tutorial) Select a company :
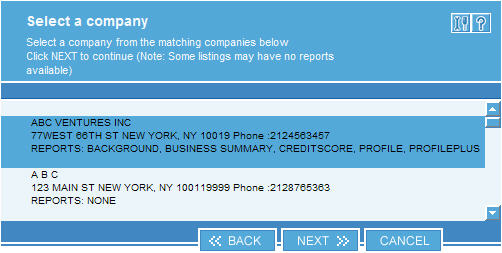
On this page all the companies that match the criteria are shown with the available records. Some companies may have no reports available. The user has to select one company and click next in order to continue with the purchase. Select report and payment method :
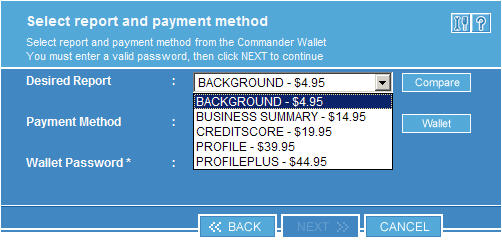
All the available reports will be listed in the Desired Report drop down list. To compare the different report types the Compare button needs to be pushed, which will show up a web page. To purchase chosen report one of the payment methods needs to be selected from the Payment Method drop down list and the password entered in the Wallet Password field. To view the wallet the Wallet button needs to be pushed. Confirm report purchase :
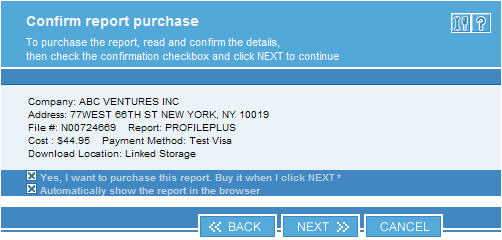
This page is used to confirm the purchase. The Company, report type and price are shown and the user needs to confirm the purchase using the "Yes, I want to purchase this....." checkbox. Also if some of the information is not correct it can be changed or canceled by using the Back or Cancel buttons. Finished :
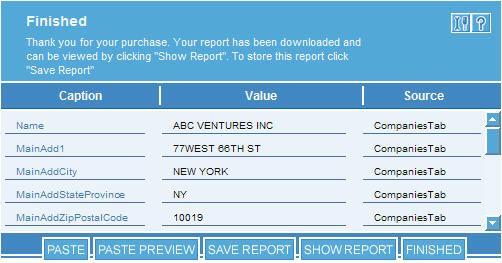
This is the final page containing all the purchased data. If the user selected Automatically show the report in the browser then the report will show up in a browser as this page opens. If not then the report can be viewed or saved using the Save Report or Show Report buttons. Also there are two paste options: Configuring the plug-in :
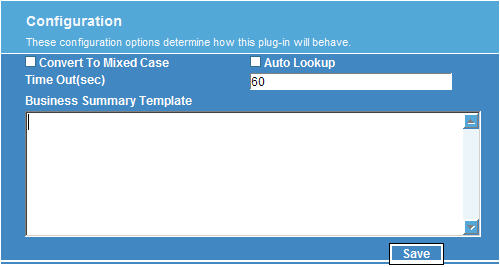
There are several options that can be configured in this section:
In order for these values to be saved the user has to click the Save button. |